 Shopping cart (0)
The imposition of kinesiology tape on the ankle area
Heel spur
Hallux valgus
Install NOW "Medical Taping" Mobile App On Android or iOS!
More than 120 instructions!

Indications: Heel spur, plantar fascitis
1. This method requires four I-tapes of 4-5 cm long, depending on anatomic features of the patient.
2. Using ligament method, apply tapes crossways on the heel in succession.
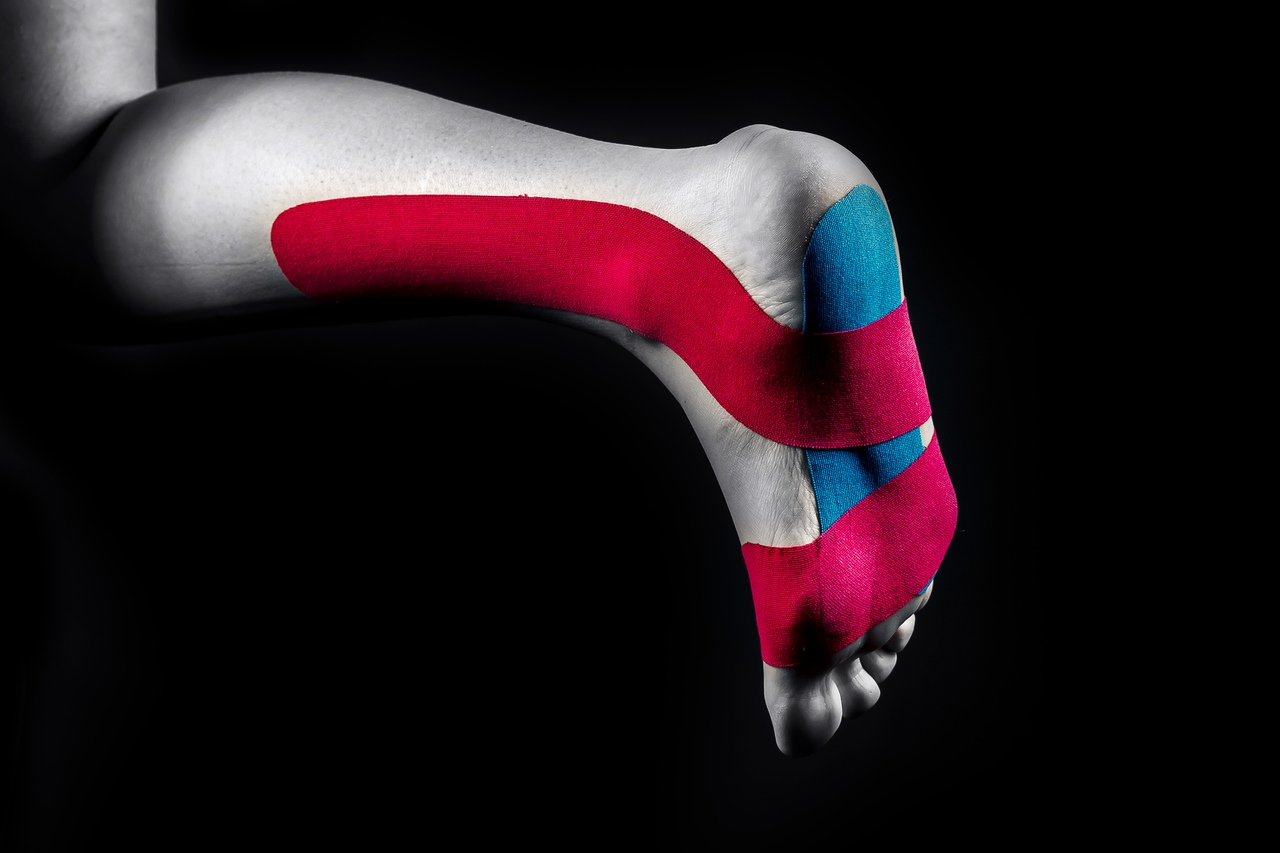
Figure eight stabilization of the ankle joint
Figure eight stabilization of the ankle joint
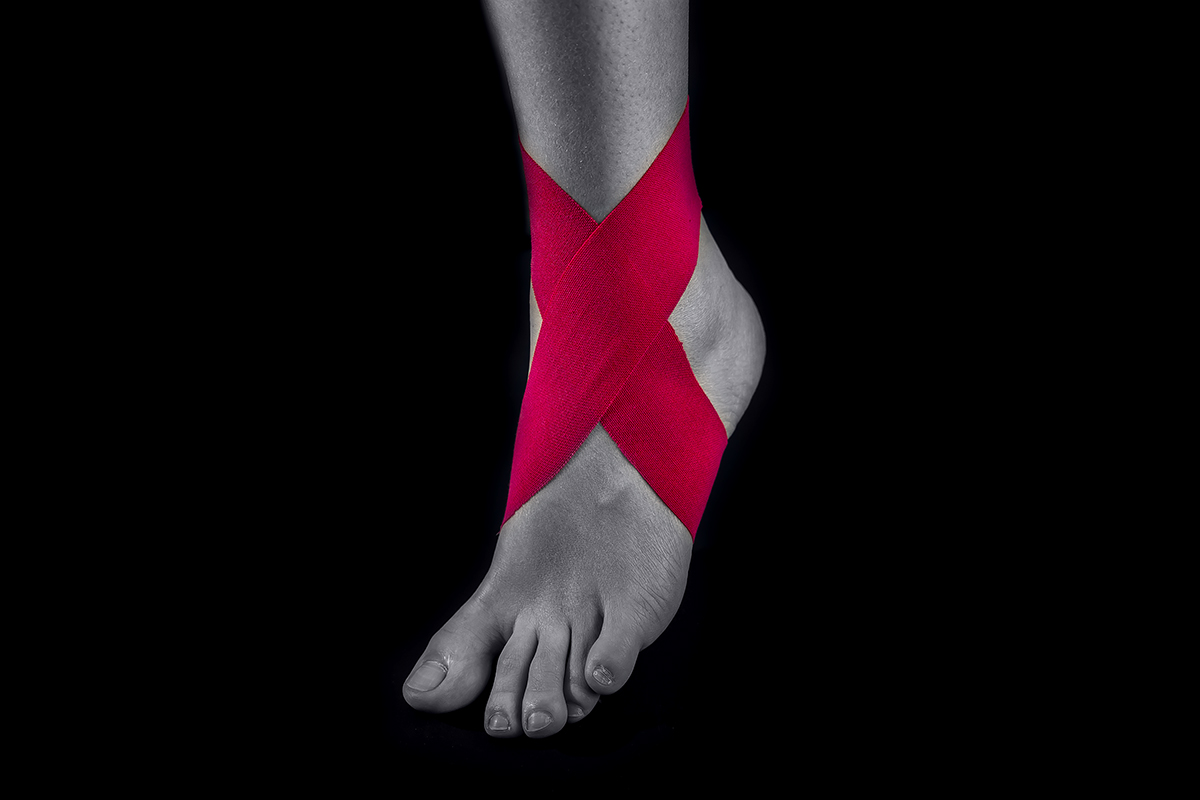
Indications: Instability in the ankle joint, damage of capsular-ligamentous apparatus in subacute and chronic periods.
1. This method requires one I-tape approximately 50 cm long. It is possible to prepare longer tape, and cut it during the work, if required.
2. Position in the ankle — bending up to 90 degrees.
3. Apply the tape base from the dorsal part at the level of the upper third of Achilles tendon, then with a 75 % tension from medial towards lateral side, apply the tape along the anterior surface of the ankle and through a plantar surface of the foot, thereby returning to the site of taping start.
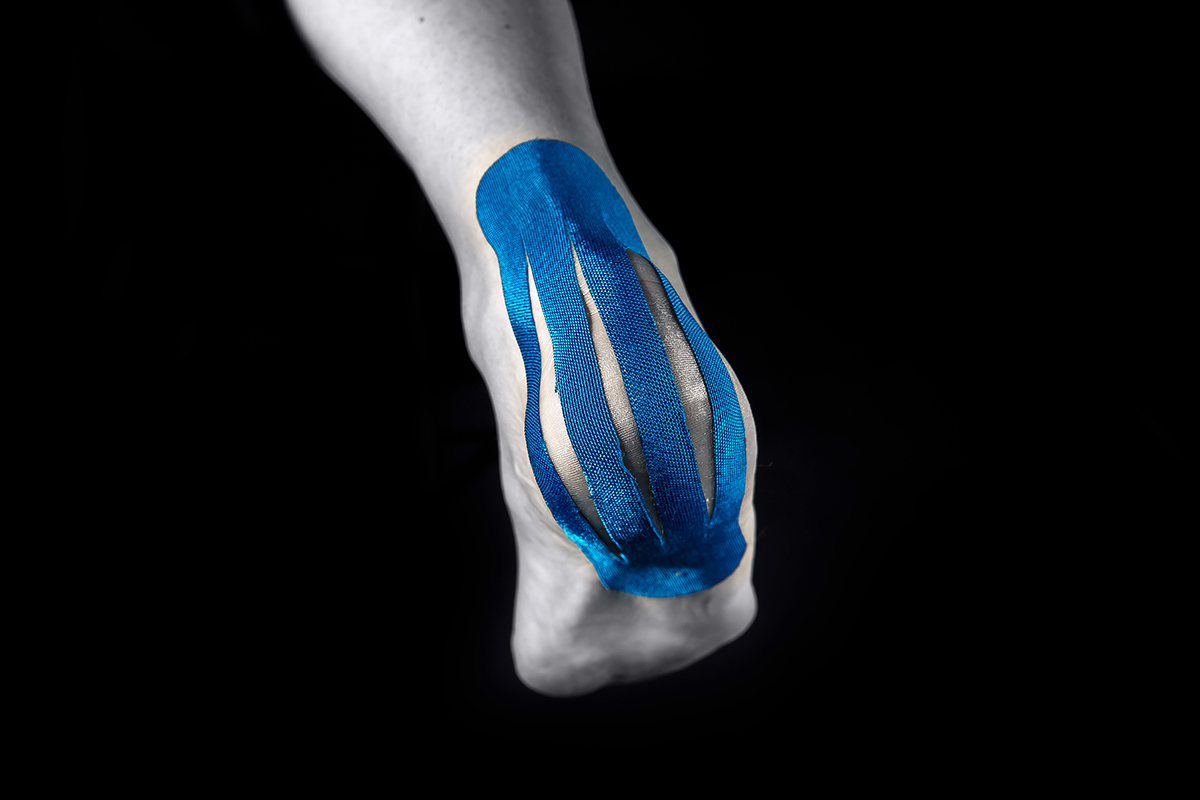
Plantar fasciitis
Indications: Plantar fasciitis, heel spur, trigger points
1. This application requires one fascia of tape and one Y-tape.
2. Sizes of tapes pieces directly depend on anatomic features of the patient.
3. Ask the patient to extend his/her toes and apply Y-tape from heel towards the toes with a 15 % tension.
4. Apply fascia tape directly in the region of pain syndrome.
Calcaneal bursitis
Indications: Achilles bursitis
1. In this case, we need a piece of the tape 15 cm long.
2. After rounding of the ends, double up the tape and cut it by strips. The ends (about 3 cm on each side) are left integer.
3. Apply both tape bases over and under the heel region.
4. Ask the patient for maximal dorsiflexion and place strips of the tape on the area of concern and by its sides.
Hammer toe deformity (2 variant)
Hammer toe deformity (2 variant)
Indications: Hammer toe deformity
1. For this correction, we need I-tape approximately 3–4 cm long and 1 cm wide.
2. Apply the tape on phalangeal joints using ligament method in the extended position.
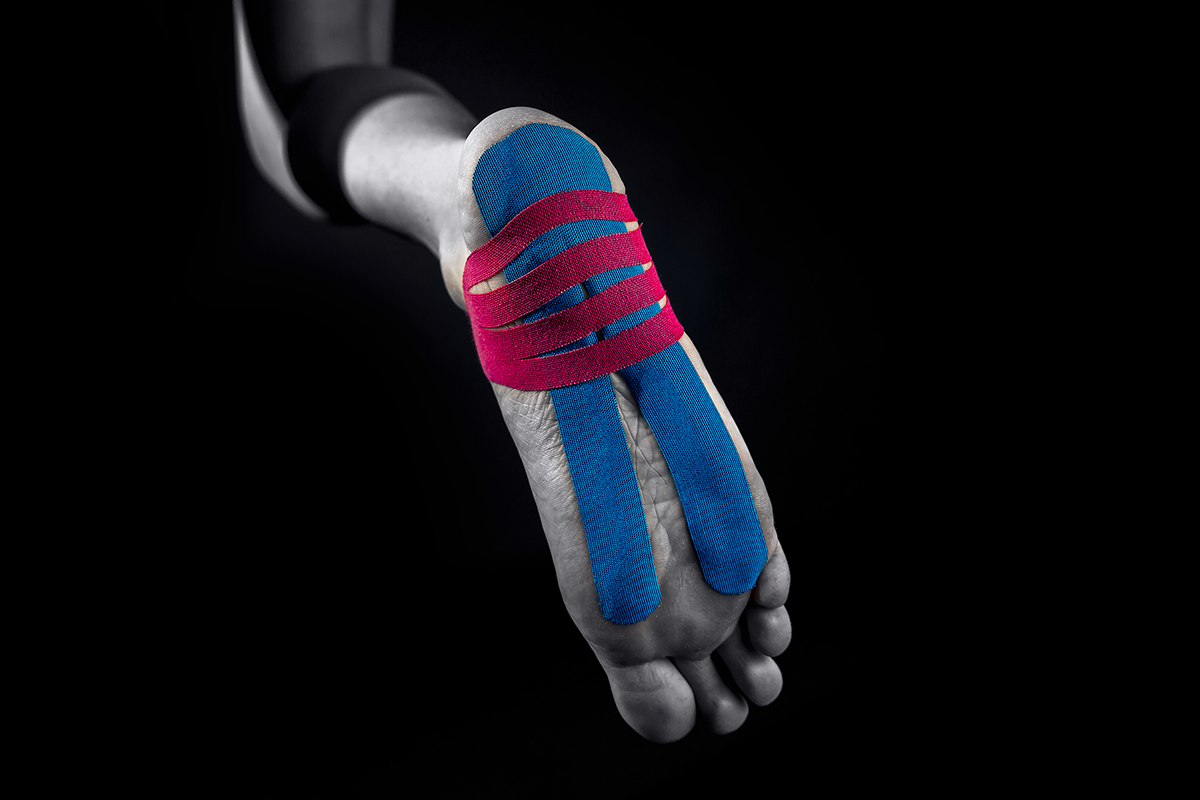
Flat foot
Flat foot
Indications: transverse and longitudinal flat foot
1. This method requires three I-tapes approximately 30, 15, and 10 cm long.
2. The first double I-tape of 15 cm is applied with a 15 % tension on plantar quadrate muscle for tonisation. The base is on the heel and the anchor is on the transverse foot arch.
3. The second tape of 30 cm long is applied on the posterior tibial muscle with a 15 % tension for tonisation. The base — a place of muscle insertion, the anchor — crossing longitudinal foot arch, passes through plantar surface.
4. The third tape for application is a correcting tape of 10 cm long using ligament method on longitudinal foot arch.
Plantar quadrate muscle
Plantar quadrate muscle

Indications: Hypertonic plantar quadrate muscle, trigger points
1. Measure and cut one piece of the tape approximately 15-20 cm long (depending on patient’s anatomic features). Divide one end of the tape into two strips equal in length of up to 5 cm long. We obtain an Y-shaped tape.
2. Ask the patient to extend his/her toes and apply the tape towards the heel with a 15 % tension. It is very important to apply the tape without folds so that it cause no mechanical irritation of the plantar surface in future.
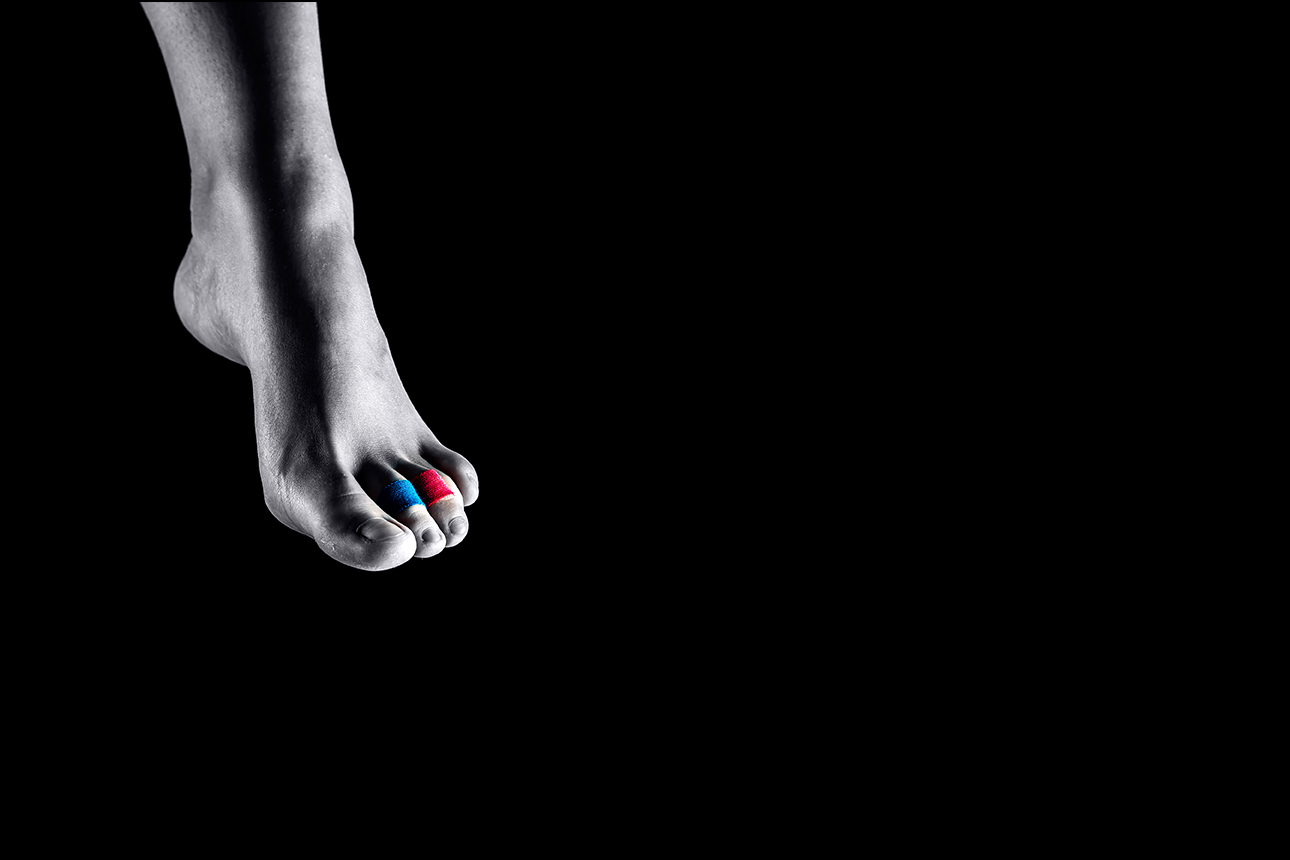
Hammer toe deformity
Hammer toe deformity

Indications: Hammer toe deformity, specific tasks upon rehabilitation (toe positioning)
1. Measure and cut two tapes different in length and width. In this case, the length of the first one is 12-15 cm and width — 1.5-2 cm. The length of the second one is of 7-10 cm, width — 5 cm.
2. The first tape is applied in the position of maximally possible extension in the joints of the toe of concern. The base of the tape is applied in the region of the metatarsal head without tension. The rest of the tape is applied with a 50 % tension towards the ankle bone.
3. Apply the second tape over the first one and perpendicularly to the anchor of the first tape for its fixation. Application is performed without tension.
Acute injury of the ankle joint
3. Apply the second tape over the first one and perpendicularly to the anchor of the first tape for its fixation. Application is performed without tension.
Acute injury of the ankle joint

Indications: Acute injury of the ankle joint (swelling)
1. Measure and cut two tapes equal in length. The length of 15-20 cm, depending on patient’s anatomic features. Cut the tapes into 4 long strips. The tape base is 4 cm, and it is left integer. The width of cut tape strips should be 0.7 cm to 1.5 cm.
2. Apply the base of the tape without tension towards the nearest lymph nodes. In this case, these are popliteal lymph nodes.
3. Apply the first tape on the lateral side. Apply the strips wave-shaped on the skin without tension.
4. Perform the same with the second tape on the frontal side.
Hallux valgus
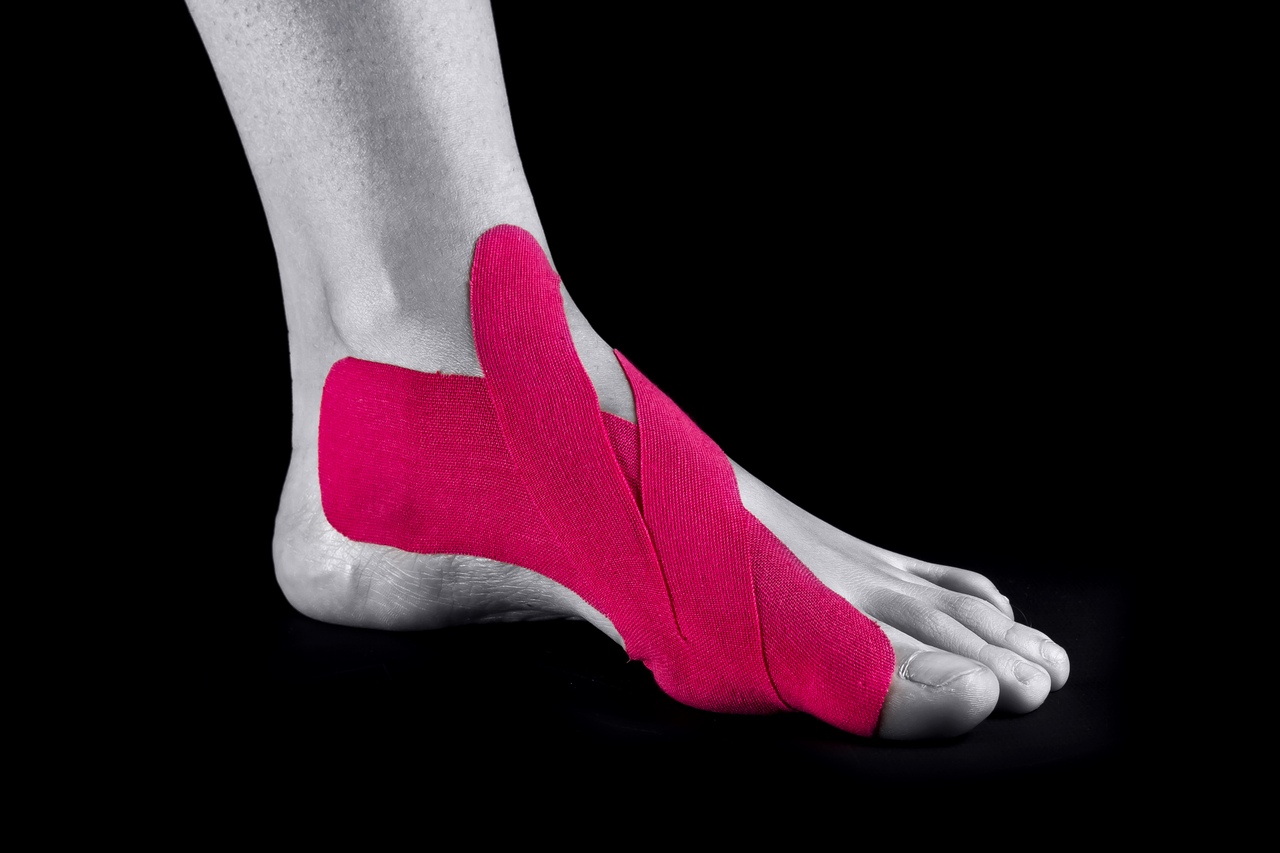
Indications: Hallux valgus, specific tasks upon rehabilitation for toe positioning
1. In this case, we need one I-tape and one Y-tape.
2. Apply the base of the I-tape on the lateral surface of distal phalanx of hallux. Then apply the body of the tape with a 15 % tension on a medial part of the ankle and around the heel.
3. Apply the second tape along the foot dorsum over the first one. Application is started from the base part of the tape, not divided into two strips. In turns, the strips are applied across metatarsophalangeal joint to the lateral part of malleolus for compression in the region of the first metatarsophalangeal joint and its positioning.
Injury of ankle joint ligaments
Injury of ankle joint ligaments
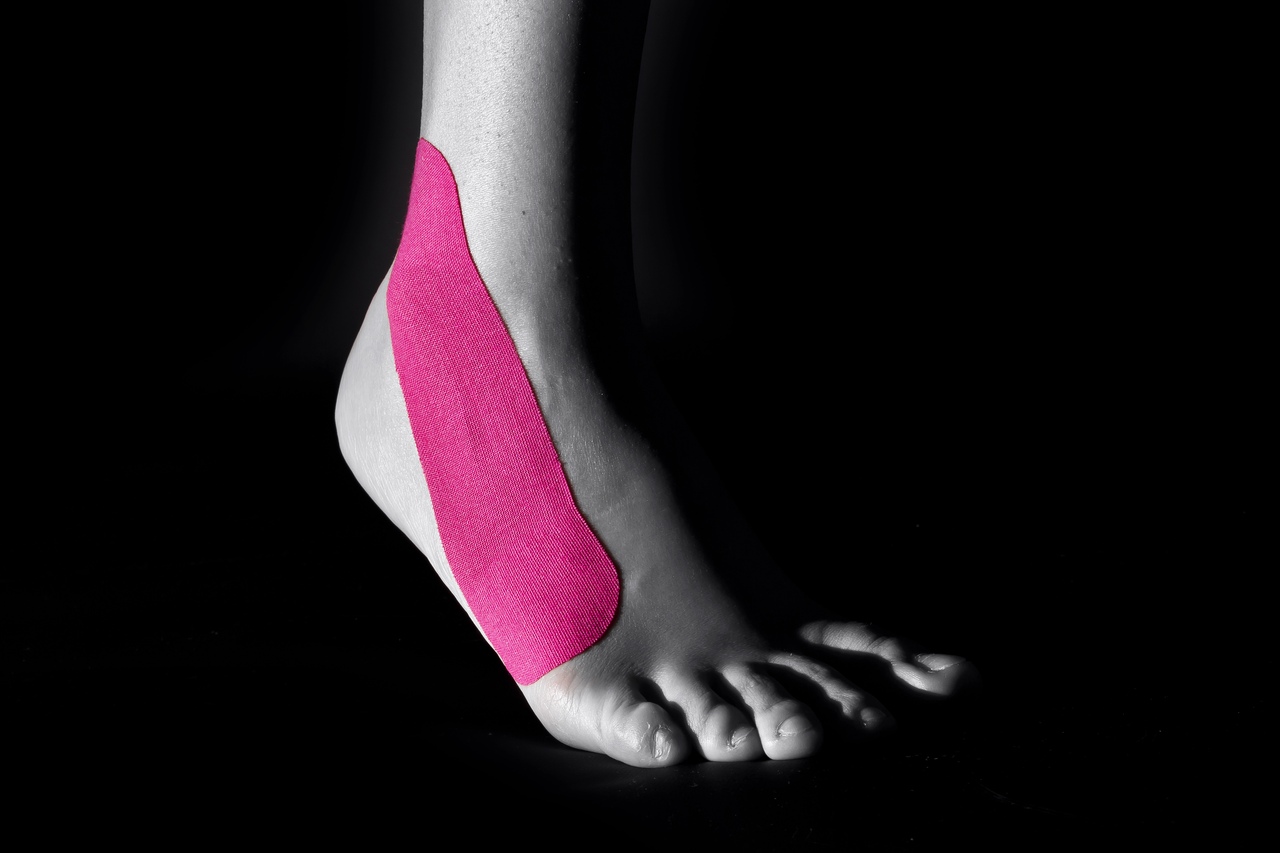
Indications: Injury of ankle joint ligaments, instability of the ankle joint
1. This method requires one I-tape approximately 15 cm long.
2. Using ligament method, apply the centre of the tape on the joint between the calf and the foot — mobile joint of the tibia, fibula and ankle bone.
Install NOW "Medical Taping" Mobile App On Android or iOS!
More than 120 instructions!
English and Russian language! Professional Pictures!


March 2020
April 2020
May 2020