 Shopping cart (0)
The imposition of kinesiology tape on the wrist area
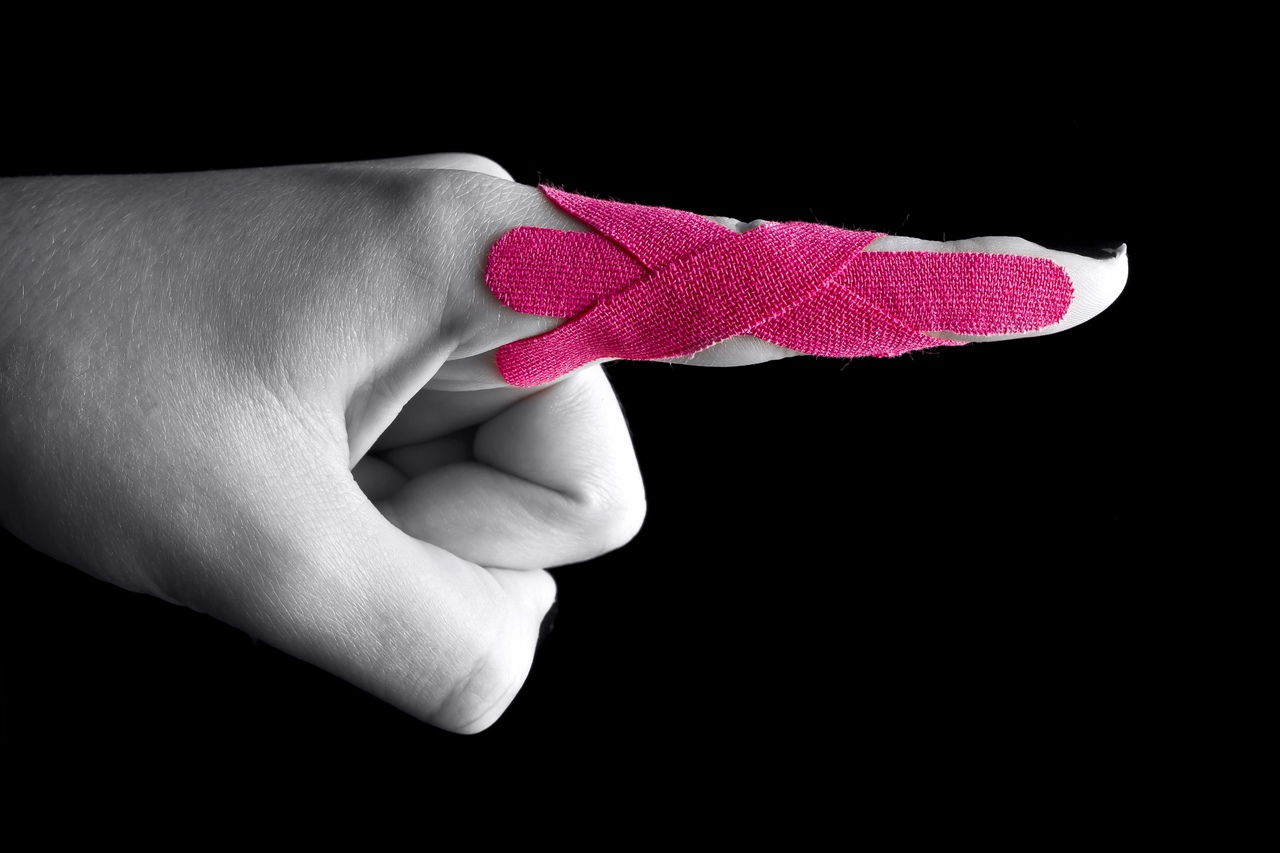
Stabilisation of the dorsal part of metacarpophalangeal joint
Install NOW "Medical Taping" Mobile App On Android or iOS!
More than 120 instructions!
English and Russian language! Professional Pictures!


Indications: Hyperextension of metacarpophalangeal joint, specific tasks in rehabilitation, injury due to joint hyperextension
1. For this method, you need I-tape and Y-tape, one of which is applied on forearm extensors, another one — on the dorsal part of the joint.
2. The tape body is applied on the distal phalanx of the finger without tension.
3. Maximal extension of the finger and hand is required. Apply the tape with the tension of 50 % on forearm extensors.
4. Apply the end of I-tape without tension on the back of the hand.
5. Apply Y-tape around the base of the proximal phalanx of the finger. Apply the tape with the tension of 50 % in the region of the dorsal part of metacarpophalangeal joint.
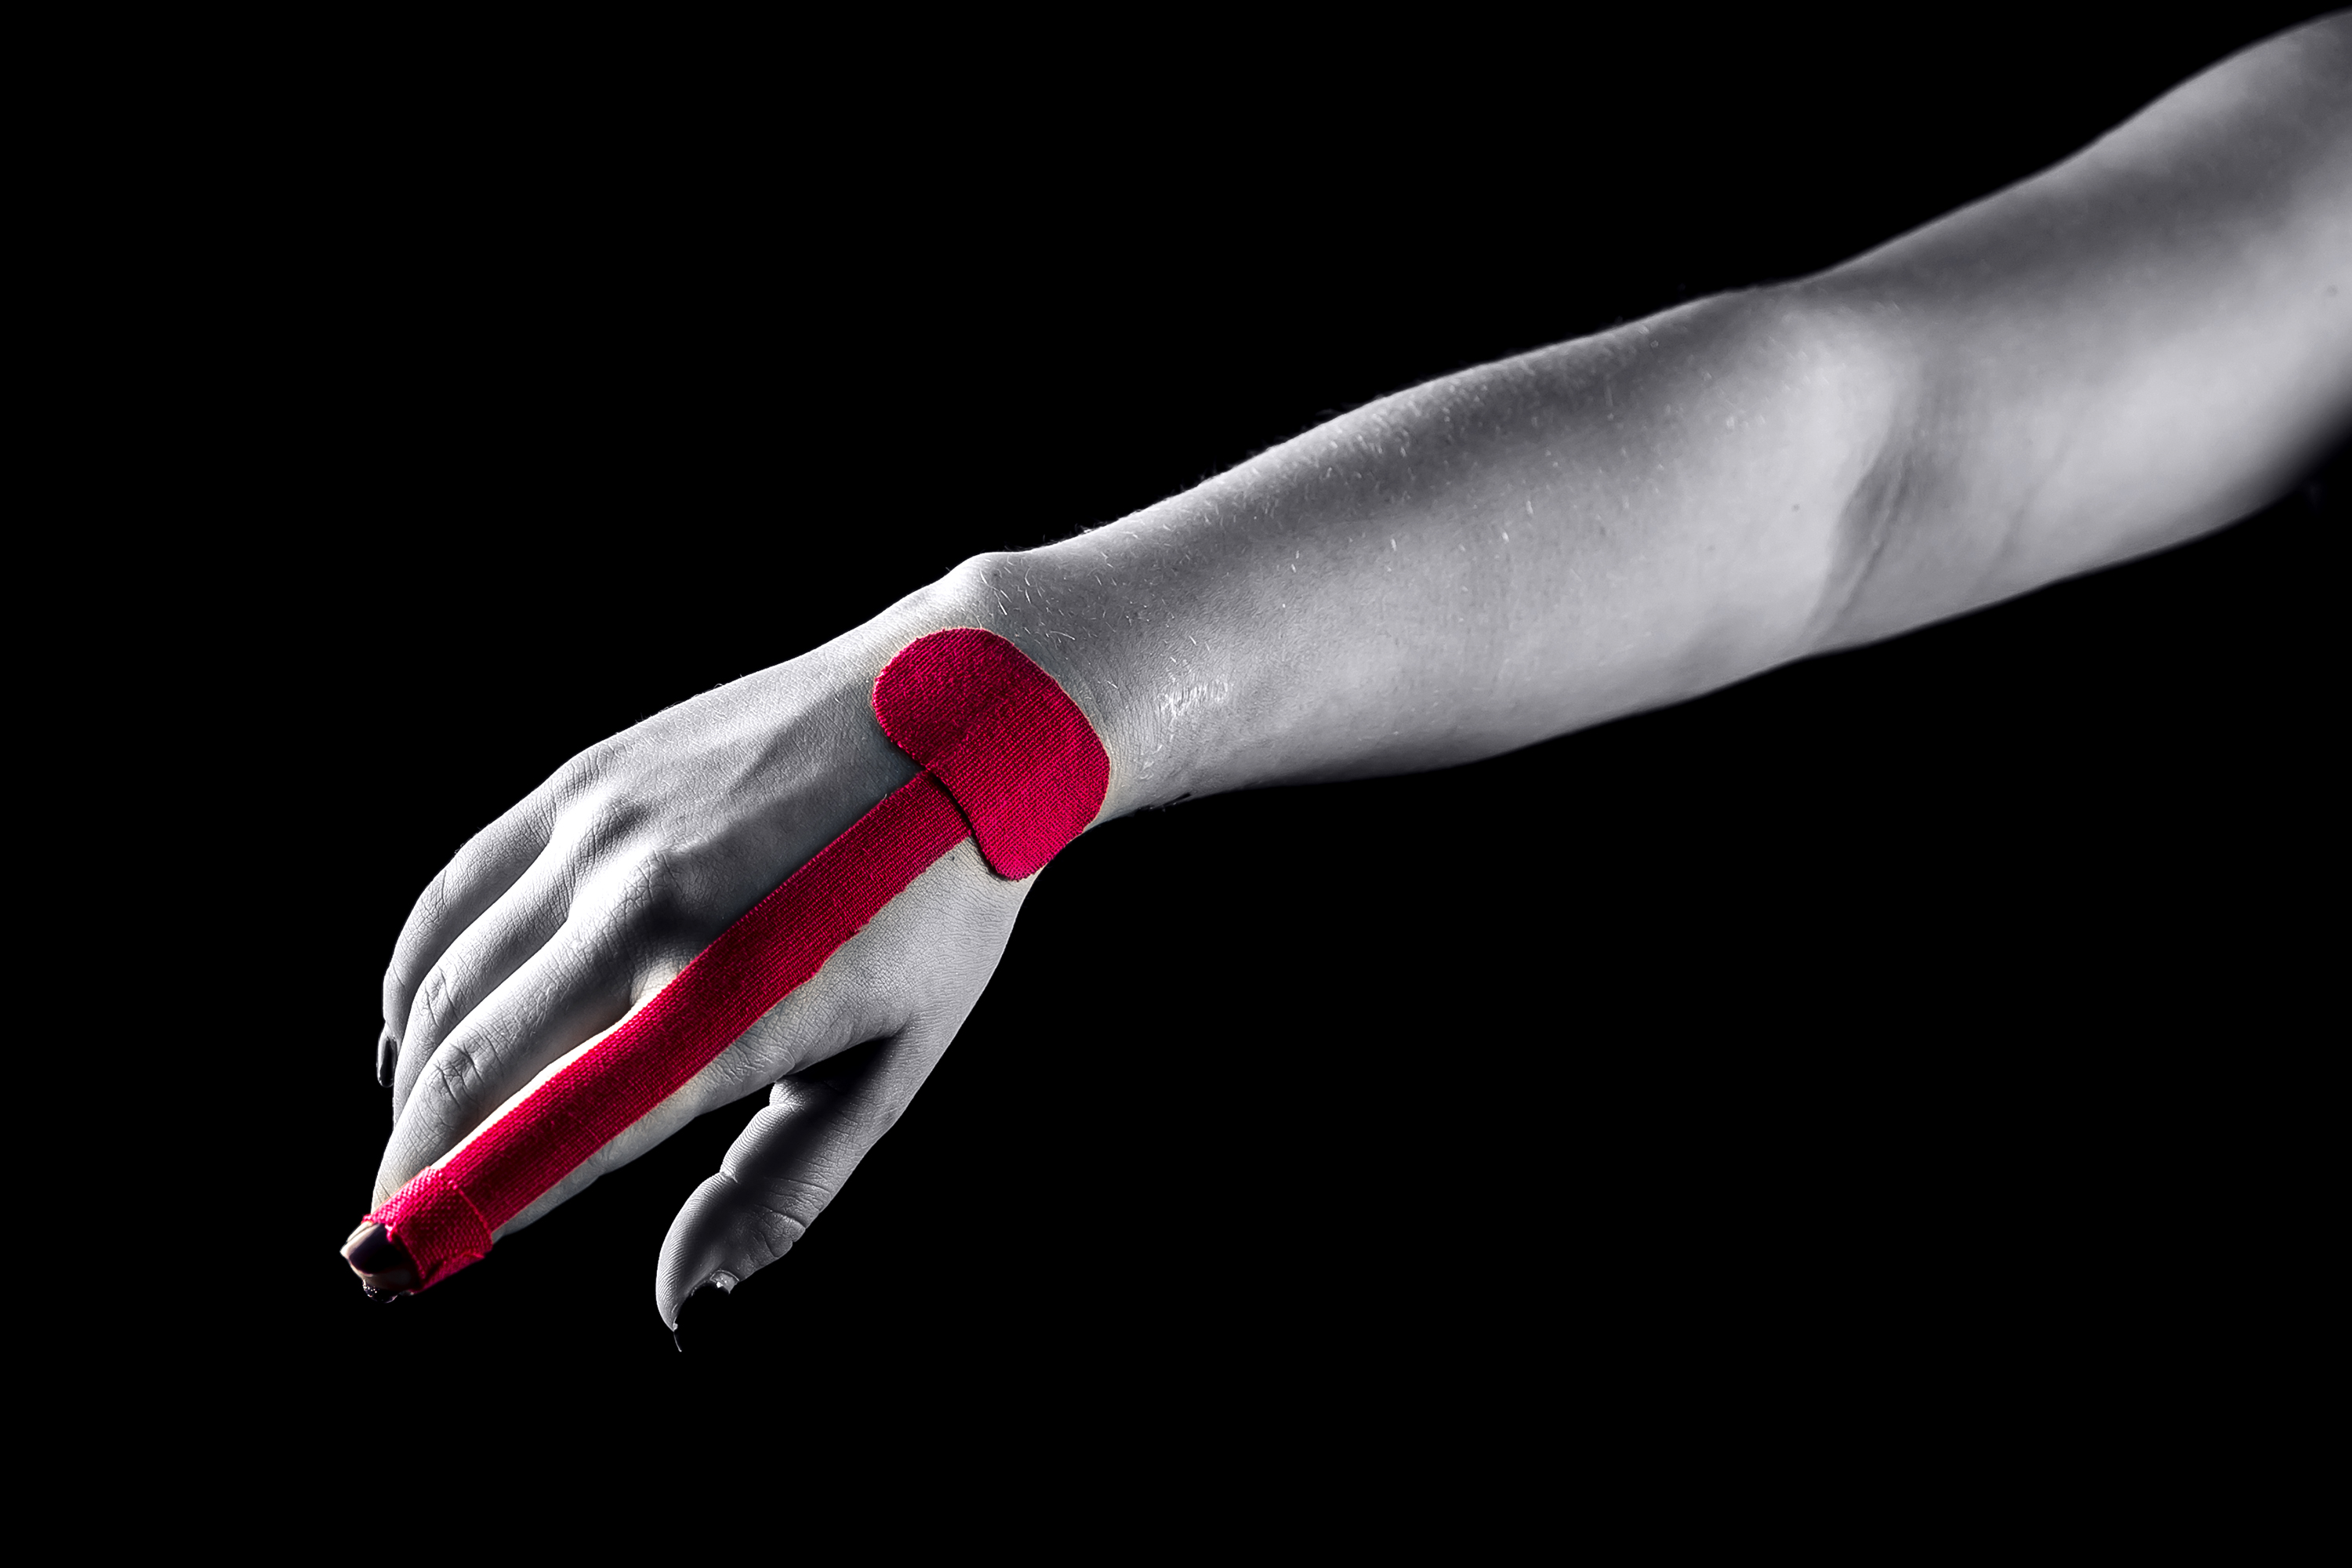
Stabilisation of the thumb
Stabilisation of the thumb

Indications: Stabilisation of the thumb, specific tasks in rehabilitation
1. Apply the base of the tape on the medial side of metacarpophalangeal join of the thumb without tension.
2. Apply an operating part of the tape with a 50 % tension along the palmar part of the thumb towards the lateral side of the joint, crossing dorsal surface of the thumb.
3. The application stabilizes the joint.
Subluxations in finger joints
3. The application stabilizes the joint.
Subluxations in finger joints
Indications: Subluxations in finger joints, stabilisation of joints
1. All tapes will be applied using the ligament method.
2. Apply the first two tapes along the joint on both sides of the injured finger. Stabilise the joint.
3. The third and the fourth are applied on the radial side, criss-crossing at the level of injured joint.
4. The fifth and sixth are applied on the ulnar side, also criss-crossing at the level of injured joint.
Extensor pollicis longus

Indications: Tendinitis, tendovaginitis, stabilisation of thumb
1. In this case, we need one I-tape for application. Tape length is of 12-15 cm.
2. Shape one side of the tape for application in the region of the distal phalanx of thumb in order to avoid application of lateral tape sides over each other.
3. Ask the patient for flexion of the finger and radial abduction in the wrist.
4. Begin application of the tape with a 15 % tension from the distal phalanx and continue to the dorsum of hand through the wrist.
Trigger finger
Trigger finger
Indications: Tendovaginitis (trigger finger)
1. This method requires three I-tapes. One tape strip approximately 12-14 cm long and 1 cm wide. The second strip for fixation is of 2–3 cm long and 1 cm wide. The third piece of the tape also for fixation is of 4-5 cm long and 3-4 cm wide.
2. The base of the first tape strip is applied in the region of distal phalanx without tension.
3. Then ask the patient for maximal flexion of the finger and wrist. Apply the body of the tape with a maximal tension. Apply the rest part of the tape of 4-5 cm long without tension.
4. Apply the second tape around the distal phalanx without tension for fixation of the base of the first applied tape strip.
5. The third piece of the tape is applied without tension over the end of the first tape strip also for fixation.
Stabilisation of the wrist joint
Stabilisation of the wrist joint
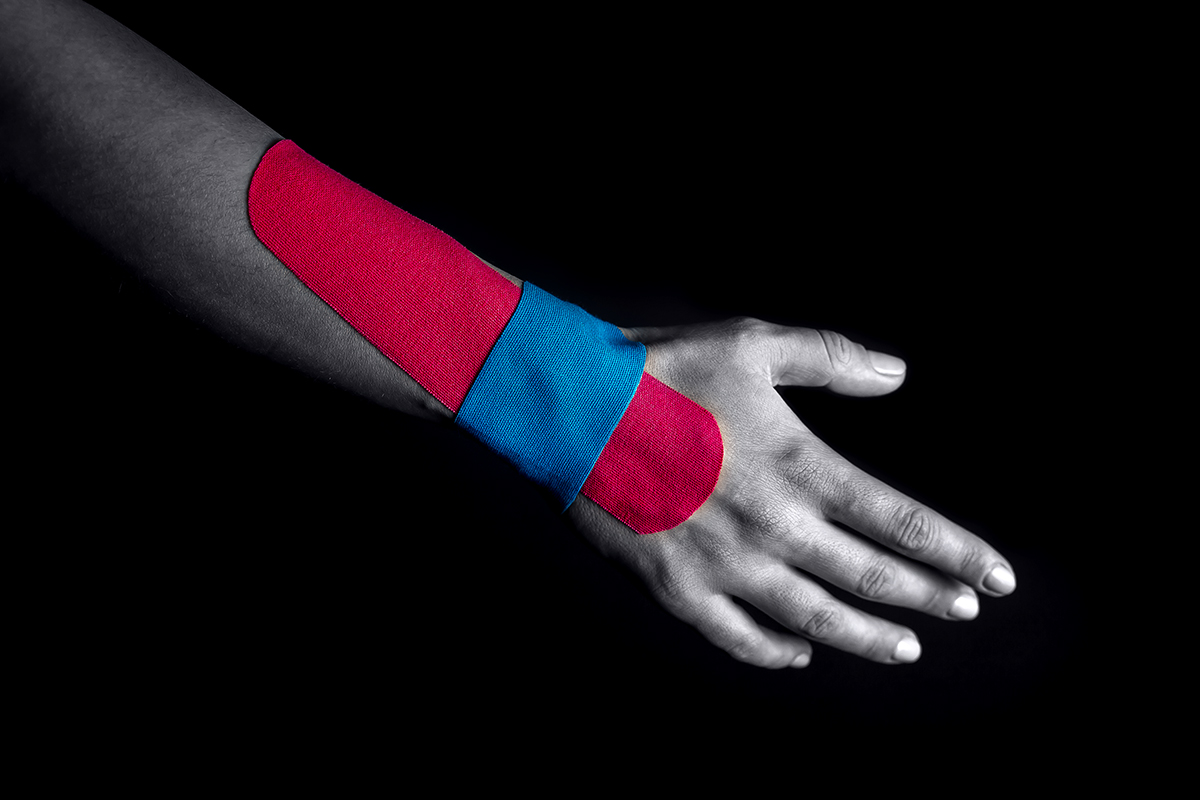
Indications: instability in the wrist joint, injury of the wrist joint in subacute and chronic periods, arthralgia due to chronic joint overloading
1. This method requires two tapes 7 and 15 cm long.
2. Apply longer piece of the tape in neutral position along the dorsal articular surface using ligament method.
3. Apply a shorter tape in a perpendicular direction to the first one using ligament method directly in the projection of the wrist joint.
4. IMPORTANT INFORMATION!!! Apply the second tape so that the ends of the tape on the palmar surface of the wrist joint do not criss-cross, this may affect circulation.
Carpal tunnel syndrome
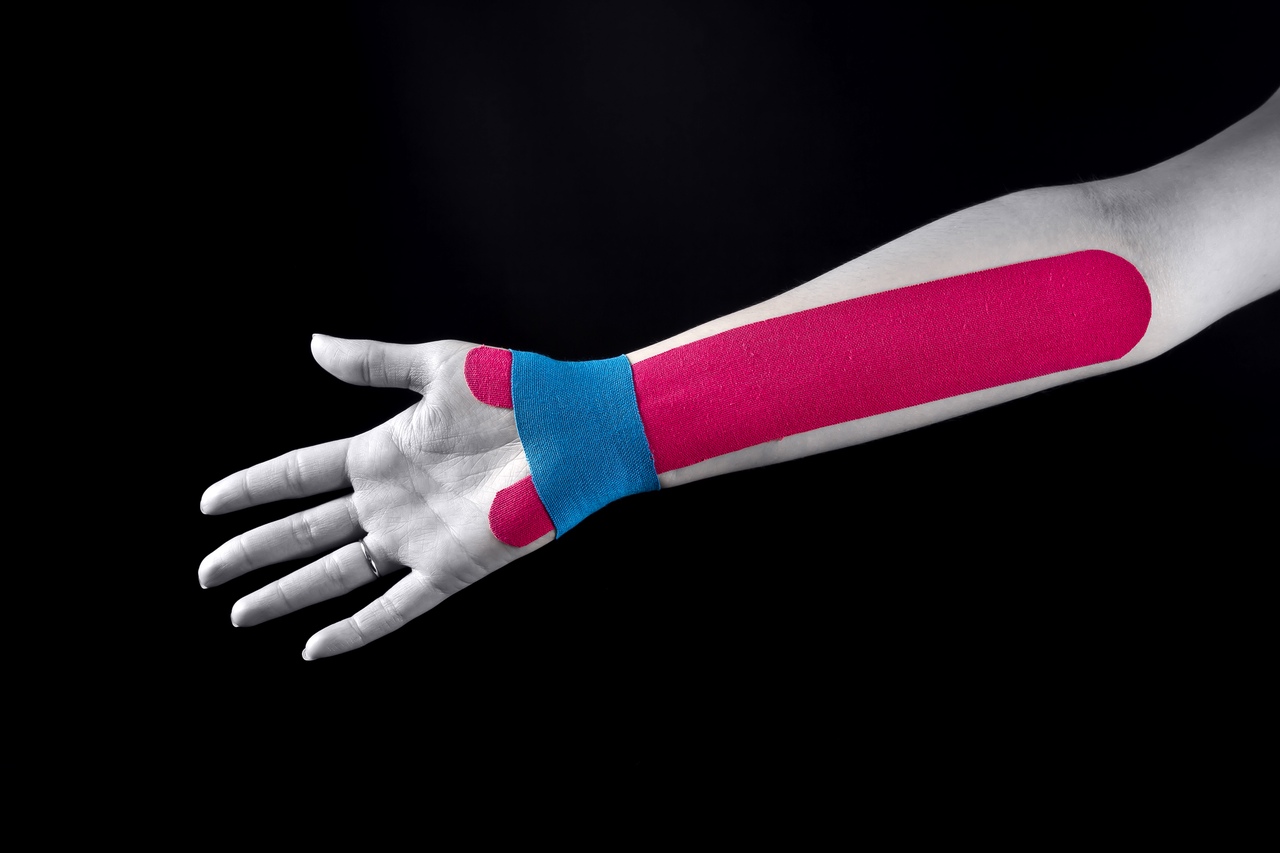
Indications: Carpal tunnel syndrome, instability of the wrist, traumatic (medial) epicondylitis
1. We will require one I-tape and one Y-tape.
2. First of all, apply Y-tape. Strips of the tape are applied without tension from the middle third of the hand palm. Then following extension in the wrist, apply an operating part of the tape with a 15 % tension towards the medial condyle.
3. Apply the second tape in the perpendicular direction to the first one, on the wrist following extension with a maximal tension. Apply tape ends without tension. This part of application is performed to unload the wrist.
Install NOW "Medical Taping" Mobile App On Android or iOS!
More than 120 instructions!
English and Russian language! Professional Pictures!
March 2020
April 2020
May 2020